

Struggling to turn your app idea into reality? Learn how prototyping tools like Figma and Adobe XD can save you time and money.
It helps developers and designers to create an interactive version of their ideas, allowing them to test designs and features early. This not only improves user experience but also saves time and money in the long run.
In this blog post, we will discuss all about mobile app prototyping and its tools. So let’s start this journey.
What is Mobile App Prototyping?
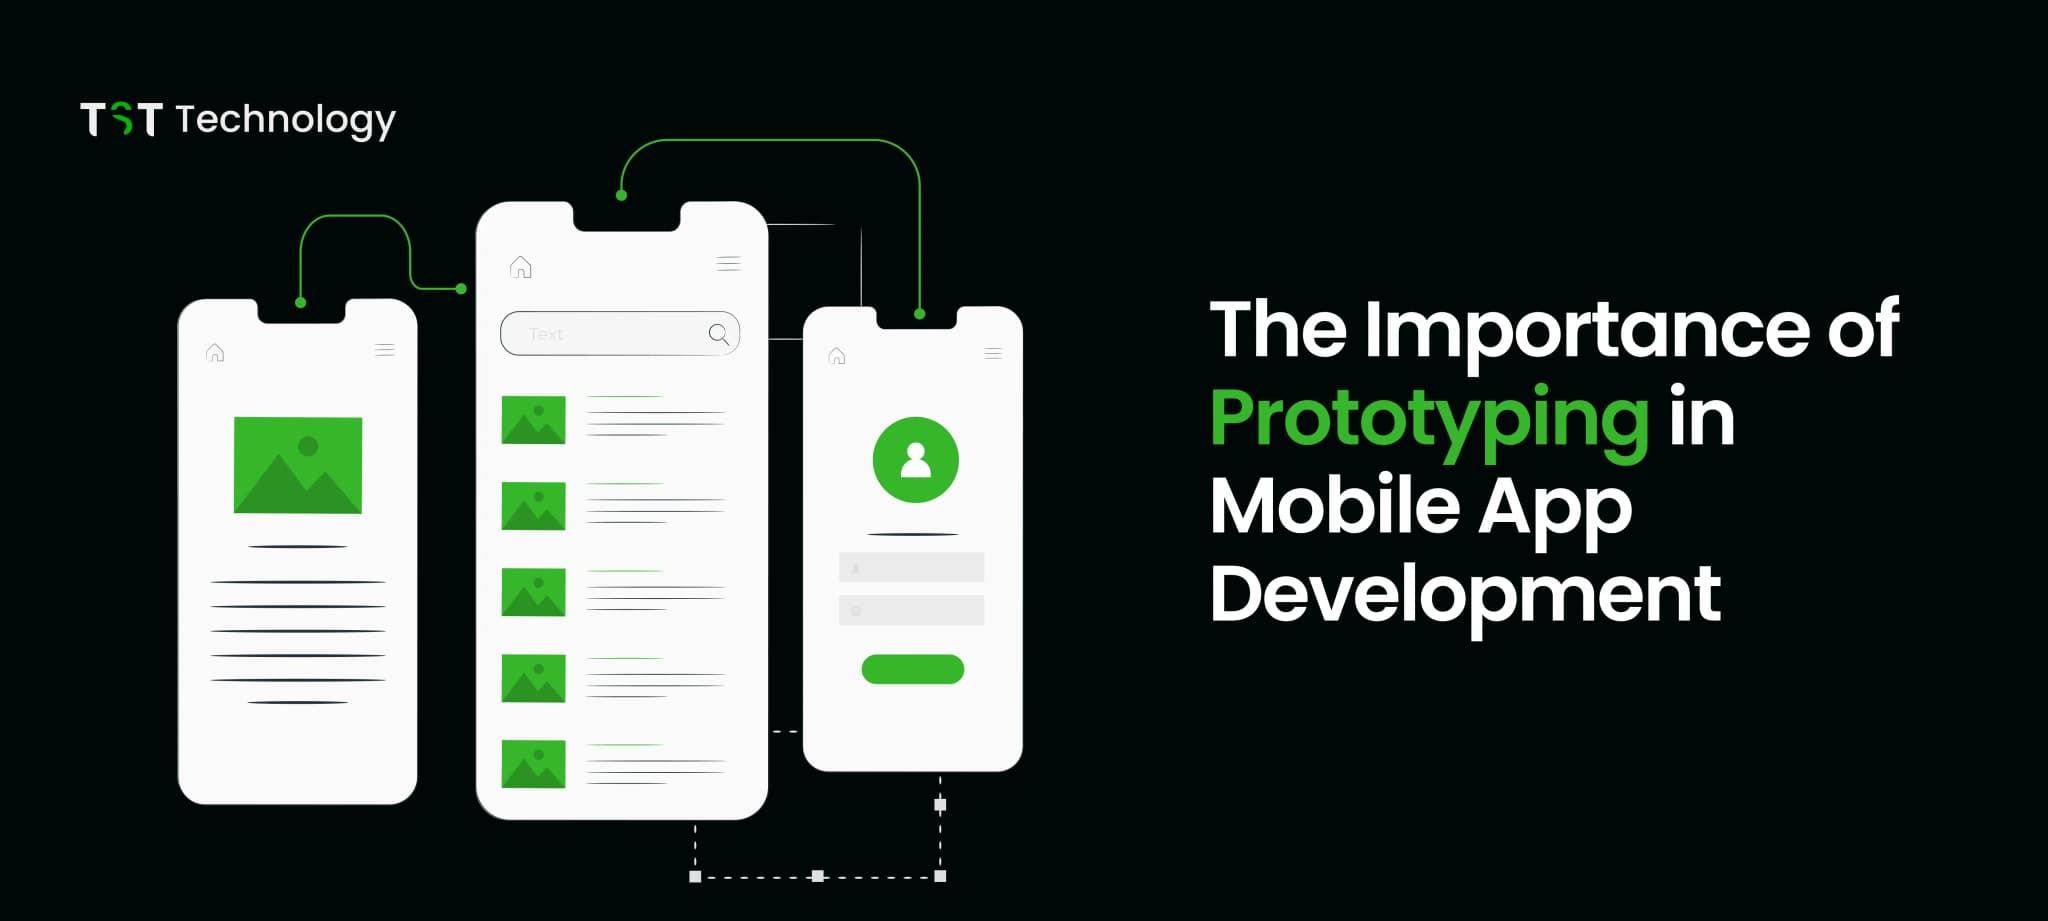
Mobile app prototyping is the process of creating a basic version of an app before you fully develop it. Think of it like a model that architects create before building a house. It’s a simple, visual sketch that helps everyone understand the app’s design, flow, and features before development begins.
Mobile app prototyping helps developers and stakeholders get early feedback on an app's features, design, and user experience. By finding problems early, you can make improvements that lead to a better final product.
Why is Mobile App Prototyping Important?
1. Early Testing and Iteration: Prototyping lets you test a trial version early, so you can use feedback to improve the app.
2. Saving Time and Money: Making changes during the design stage is much easier and cheaper than doing it after development starts.
3. Team Alignment: Prototyping makes sure all team members, from developers to designers, are on the same page.
Stages of Mobile App Prototyping
To understand mobile app prototyping, we can divide the process into three main stages: Ideation and Concept Development, Designing and Creating the Prototype, and Testing and Improving Based on Feedback.

Let’s go through them one by one.
Stage 1: Ideation and Concept Development
- This is where everything starts. Define the purpose of your app. What problem are you solving, and how will users benefit? A clear idea helps you decide the key features of your app.
- Prototyping helps you organize ideas and plan the app development.
Stage 2: Designing and Creating the Prototype
- Now you have created your ideas in visual form. First, create wireframes, which show the basic layout of your app. These wireframes are slowly transformed into detailed mockups, giving the app a clear look and feel.
- Using tools like Figma or Sketch, you can create prototypes that look and work like the final app. It's important to get feedback from developers, designers, and stakeholders during this stage to make sure the prototype is on the right track.
Stage 3: Testing and Iterating Based on Feedback
- Once your prototype is ready, test it with real users. Get their feedback on how easy it is to use, the design, and the features. Tools like InVision or Marvel can help simulate the app's real-life experience. Use the feedback to improve the prototype before full development.
In this way, the stages of mobile app prototyping can be understood in simple language. Every stage is important and guides you step-by-step to reach the final product.
9 Best Mobile App Prototyping Tools

1. Figma
Figma is a popular cloud-based tool for designing and developing apps. It helps teams work together smoothly. Everyone can see the designs, give feedback, and make changes in real-time.
This means you don't have to send prototypes back and forth for approval. The whole design process becomes faster and easier.

Features of Figma
- No-code Prototyping: You can create interactive prototypes without coding. This feature is very helpful for beginners.
- Interactions and Animations: You can add user flows, animations, and transitions to your prototypes, which help mimic the experience of the final app.
- Collaboration: Multiple users in Figma can design together, give feedback, and modify designs without any delay.
- Widgets and Plugins: Figma offers a plethora of widgets and plugins that streamline and expedite your design process.
- Viewing Prototypes on Mobile Devices: This feature allows you to see how your prototypes will look and feel in the real world.
Pros and Cons of Figma
Pros
- Many plugins and widgets are available.
- An active user community, which gives you a lot of support.
- Drag-and-drop prototyping, which is quite easy for beginners.
Cons
- You can't preview GIFs in a working document, so you have to switch to prototype mode.
- There is limited control over document management, which can be a bit challenging in larger projects.
2. InVision
With the help of InVision, a cloud-based prototyping tool, mobile app developers can generate interactive prototypes.
It allows teams to quickly make prototypes and share them for feedback. With InVision, you can work with your team in real time and test your designs like a live product.

Features of InVision
- Collaborative Prototyping: Multiple users can design together and give feedback.
- Design Templates: Pre-made templates make the design process fast and easy.
- Whiteboard: An effective tool for brainstorming and idea sharing in groups is the whiteboard.
- Integrations: Jira, Loom, Asana, Azure DevOps, Sketch, Zoom, Adobe XD, Microsoft Word, and so forth.
Pros and Cons of InVision
Pros
- Easy collaboration and interactive interface.
- 200+ templates available.
- Friendly for non-tech-savvy users.
Cons
- The platform sometimes logs out users for security reasons.
- There may be a lack of basic tools and various import issues.
3. Justinmind
Justinmind is a tool for creating web and mobile app prototypes that look like the final product. It helps teams work together with features for design, interaction, and collaboration.
The tool also offers pre-built UI kits for iOS, Android, and the web, making the design process faster. These kits are updated regularly, giving you plenty of options for different app prototypes.

Features of Justinmind
- No-Code Prototyping: You can create prototypes without coding.
- Web Interactions: It is easy to add Web-specific interactions.
- Mobile Gestures: You can incorporate mobile gestures like swipe and tap.
- Pre-Built UI Kits: Ready-made UI components are available to complete the design faster.
Pros and Cons of Justinmind
Pros
- A rich web interactions library is available.
- Facility to work offline.
- Creating designs is easy with the drag-and-drop prototyping feature.
Cons
- The search feature is not so specific.
- There may be a slight learning curve.
4. Marvel
Marvel is a simple and easy-to-use cloud-based tool for creating interactive prototypes. It is perfect for beginners as it does not require any coding.
The tool has a clean interface and ready-made templates, making the design process smooth and fast.

Features of Marvel
- No-Code Interactions: You can add interactive actions and transitions without coding.
- User Testing: You can get feedback by sharing your prototypes with developers, testers, and stakeholders.
- Templates and Components: Pre-made templates and UI components are available in Marvel, which help in completing the design process faster.
- Collaboration Tools: Collaborative design and feedback collection with team members is easy.
Pros and Cons of Marvel
Pros
- Generous Freemium Plan: A free plan is available,e which is useful for beginners.
- Variety of Templates: A good variety of templates is available for web app design.
- UI Components Library: You can save time with a library of pre-made UI components.
Cons
- Prototype Duplication: Prototypes can be a little difficult to duplicate.
- Button Visibility: Hiding the buttons on the screen can be a bit challenging.
5. Sketch
Sketch is a popular prototyping tool made for Mac users. It is a vector-based tool, meaning you can resize shapes and images without losing quality.
It works smoothly on Mac devices, even with large projects. Sketch also offers many plugins to help create unique designs.

Features of Sketch
- Smart Layout: This feature allows you to easily adjust design elements.
- Developer Handoff Tools: These tools help developers to easily understand and implement designs.
- Design Mirroring: You can see your design changes in real-time.
- Shared Component Libraries: This feature allows you to reuse common design elements.
- iPhone App for Prototype Testing: With this, you can test your prototypes on an iPhone.
- Integrations: With Sketch, you can use tools like Abstract, Flinto, Maze, Overlay, ProtoPie, and Zeplin.
Pros and Cons of Sketch
Pros
- Wide Variety of Plugins: There are many plugins available for your design.
- Works Offline: This tool works even without the internet.
- Short Learning Curve: It is easy to learn its use.
Cons
- Collaboration with Windows Users: Collaboration with Windows users can be a little tricky.
- Exclusive for macOS: It can only run on macOS.
6. Adobe XD
Adobe XD is a powerful tool for app developers to create high-quality prototypes quickly. It is designed for UX designers to handle design, prototyping, and user experience in one platform.
It also works well with other Adobe tools like Photoshop and Illustrator.

Features of Adobe XD
- Design and Prototype in One Tool: Adobe XD provides both design and prototype functionalities on one platform.
- Seamless Integration: Good integration with Creative Cloud apps, like Photoshop and Illustrator.
- Interactive Prototypes: You can add transitions and animations to make the design interactive.
- Real-time Collaboration: Real-time collaboration and feedback integration with team members.
- Voice Prototyping: A Facility to integrate voice interactions and commands into the prototype.
Pros and Cons of Adobe XD
Pros
- User-Friendly Interface: Simple and intuitive design, which is easy even for beginners.
- High Performance: High-fidelity prototypes can be created quickly.
- Creative Cloud Integration: You can easily import assets from Photoshop and Illustrator.
- Real-time Collaboration: seamless collaboration and feedback integration with the team.
Cons
- Limited Free Features: Some features are restricted in the free plan; a paid subscription is required.
- Learning Curve for Advanced Features: There may be a slight learning curve to fully utilize advanced features.
7. Mockplus
Mockplus is a simple and fast prototyping tool that helps design teams create detailed prototypes quickly. It works on multiple platforms, making it suitable for both beginners and experienced designers.
You can easily import design files from Sketch, Adobe XD, and Figma, and then convert them into prototypes. Once uploaded to the cloud, all team members can view and collaborate on them. Mockplus makes teamwork easier and speeds up the prototyping process.

Features of Mockplus
- Drag-and-Drop Prototyping: You can easily create prototypes by dragging and dropping elements.
- Auto-Generated Style Guides: Design style guides are automatically generated, making development easier.
- Smart Gestures and Animations: You can add gestures and animations for interactive prototypes.
- Full-View Storyboard: A full-view storyboard is available to visualize the flow of your prototype.
- Project Tree: A structured project tree to organize your projects.
- Interaction Cloning: An interaction can be duplicated and used in multiple elements.
Pros and Cons of Mockplus
Pros
- Extensive Library of Tutorial Videos: A library of tutorial videos helps you learn the tool.
- Proactive Support Team: The support team is always available to help.
- Built-in Task Management Feature: The task management feature helps in organizing and tracking projects.
Cons
- Switching Complexity: Switching from the management area to the design area can be a little complex.
- Learning Curve: There may be a slight learning curve in the beginning, but it gradually improves.
8. UXPin
UXPin is a powerful prototyping tool that allows designers to create both simple and advanced prototypes without coding. It improves teamwork between designers and developers, making the design process faster and more efficient.

Features of UXPin
- No-Code Prototyping: The best feature of UXPin is that it allows you to create interactive prototypes without writing any code, which makes the design as well as the development process very easy.
- Real-Time Collaboration: On a single project, you can collaborate in real-time with multiple team members, which you can quickly update based on designs and feedback.
- Automatic Documentation: This tool helps in designing your prototypes. It automatically generates specs and CSS code, providing the development team with the necessary details for implementation.
- Interactive States: UXPin allows you to easily design and prototype interactive states, which helps you accurately model real-world scenarios.
- User Feedback: You can share your prototypes and get user feedback, which helps you improve your designs.
Pros and Cons of UXPin
Pros
- Code and Specs Generation: UXPin automatically generates code snippets and design specs along with your prototypes, which speeds up the development process.
- Desktop Application: This tool is available for both Mac and Windows platforms, so you can work on your favorite device.
- Powerful Interaction Features: UXPin's interaction features are quite advanced, which helps in handling complex animations and transitions.
Cons
- Performance Issues: Sometimes, UXPin can be slow with complex prototypes, which can cause lag and interruptions in the design process.
- Learning Curve: Experienced designers may find UXPin's shortcut commands a bit confusing, as they are a bit different from other tools.
9. Framer
Framer is an all-in-one tool for designing and prototyping mobile apps. It helps you quickly create interactive prototypes with smooth animations and transitions, making the user experience more engaging.

Features of Framer
- Interactive Components: Framer provides you with pre-built and customizable components, so you can add easy transitions and interactive elements.
- Animation Library: This tool has a comprehensive animation library, with which you can create seamless animations.
- Freeform Canvas: Your design process becomes even more flexible because this tool provides you with a freeform canvas.
- Breakpoints: This feature helps you create responsive layouts for different screen sizes.
- SEO & Performance Tools: Framer also offers SEO and performance optimization tools, which improve your final product.
- Integrations: Framer integrates with popular tools like Formspark, Google Optimize, HubSpot, Intercom, Mailchimp, and Typeform. These integrations make your workflow even smoother.
Pros and Cons of Framer
Pros
- Easy Interactions: Prototyping makes interactions fun and simple, making the design process enjoyable.
- All-in-One Tool: You can design, draw, prototype, and publish all with one tool.
- Great Tutorials: Framer has excellent video tutorials that are helpful for beginners.
Cons
- Small Community: Framer has a small community, so if you have any problems, you can get help from the support team.
- Limited Grid Support: This tool does not support simultaneous grids, which may be problematic for some designers.
How to Select the Best Mobile App Prototyping Tools?
1. Ease of Use
- A user-friendly tool is essential, especially for beginners. Look for a tool with a simple interface, drag-and-drop features, and pre-made templates to make designing easier.
2. Collaboration Features
- If you are working with a team, choose a tool that supports real-time collaboration. This allows multiple team members to work together, give feedback, and track changes easily.
3. Integration with Design Tools
- Many designers use tools like Adobe XD, Sketch, or Figma. A good prototyping tool should integrate with these platforms so you can import your designs and turn them into prototypes without extra effort.
4. Interactive Prototyping
- Your tool should allow you to add interactive elements like buttons, animations, and transitions. These features help in creating a realistic experience of how the final app will function.
5. Platform Compatibility
- Make sure the tool supports your target platforms, such as Android and iOS. Some tools work only on specific platforms, so check compatibility before choosing one.
6. Cost and Licensing
- Budget is an important factor. Some tools are free or offer a trial, but advanced features may require a paid plan. Choose a tool that fits your budget and meets your project needs.
Step-by-Step Process of Mobile App Prototyping
To understand the process of mobile application prototyping, we follow a step-by-step approach.

so let's start:
Step 1: Define Your App’s Purpose
- First of all, you need to be clear about the purpose of your app, which means you need to understand what your app will be developed to achieve and who your target users are.
- In this step, market research and analysis of user needs is done.
- This stage gives you a clear vision of what problem your app will solve and how it will be implemented.
Step 2: Sketching and Wireframing
- In this step, you create the basic design of your app.
- First of all, make rough sketches in which you outline the basic layout and features. This can start with pen and paper or use digital tools.
- In this stage, you create wireframes, which are the blueprint of your app.
Step 3: Choose a Prototyping Tool
- Once your sketches are done, it's time to choose the right prototyping tool as per your needs and requirements.
- For beginners, tools like Adobe XD or Marvel are good, while experienced designers prefer advanced tools like Figma or InVision.
- These tools help you turn your sketches into an interactive digital prototype.
Step 4: Create a Digital Prototype
- In this step, you convert your sketches into digital form.
- Here you can design the screens of the app and add buttons, text, images, and other elements to them.
- This prototype is a working model of your app that is visual and interactive.
Step 5: Add Interactivity
- Now you have added interactivity to your prototype.
- This means that you create links between different screens to simulate user actions (e.g., clicking, scrolling).
- This step is necessary so that your prototype gets a realistic feel.
Step 6: Initial Testing and Iteration
- When your prototype is ready, you start testing it. During testing, you find flaws in usability and design.
- Then you make changes based on feedback and make the prototype even better.
- This process is repeated again and again until you get your desired results.
Step 7: Final Refinement
- Finally, you have given the final touch to your prototype. Here, you give a professional look to your design by polishing colours, fonts, images, and details. This stage brings the prototype closer to the final product.
These steps simplify the process of mobile app prototyping and ensure that your final product is user-friendly and according to the market's needs.
Build the Solutions of the Future with Mobile App Prototyping Tools
Mobile app prototyping tools are important in today's digital world, especially for visually presenting ideas. These tools help your design team showcase concepts clearly, allowing you to see the final product before development. The biggest advantage is real-time feedback, making it easy to improve your design.

As of July 2024, mobile devices were responsible for 59.7% of the global web traffic. When selecting a prototyping tool, first understand your project requirements. Every project has different needs. If you need high-fidelity prototypes with animations, choose advanced tools. For simple wireframes or low-fidelity prototypes, go for easy-to-use tools.
It is important to pay attention to the user interface and usability while choosing a mobile app prototyping tool. The experience level of team members may be different, so it would be better to choose user-friendly tools. Complex tools can delay the project timeline. For more information, about the Mobile Application Development Framework, you can check out our blog.
The Mobile App Prototype Examples
Verification Page Prototype
A verification page prototype helps in designing a smooth and user-friendly identity verification process. It ensures that users enter their required details correctly before proceeding. This prototype gives a clear idea of how the app will handle user verification.
1. Login and Identity Verification
- The prototype includes a login screen where users verify their identity.
- Users need to submit their Aadhaar card and PAN card details.
- The design is simple and clear so users can easily understand what to do.
2. Input Fields and Placeholders
To guide users in entering the correct details, the prototype provides placeholder text. These placeholders help users know what to enter in each field.
- "Enter your Aadhaar Number"
- "Upload Aadhaar Front and Back Side Photo"
- "Enter PAN Number"
- "Upload PAN Card Photo"
3. Mandatory Fields and Validation
It is important to ensure that users do not skip any required fields. The prototype includes validation rules to make sure the information is complete before submission.
- All required fields are properly marked to ensure completion.
- The submit button remains disabled if details are missing.
- If any field is left blank, a validation message appears.
4. Submission Process
Once the user enters all details correctly, they can proceed to the next step. If there are any mistakes, the prototype helps in identifying and correcting them.
- If the details are correct, the next screen shows a success message.
- If there are errors, the prototype displays an error message.
- Users can correct their details and try again.
This type of prototype helps developers and stakeholders visualize how the verification process will work and ensures a seamless user experience.
Conclusion
Mobile app prototyping tools are a powerful way to turn your ideas into reality. These tools help you gather early-stage feedback, detect design flaws, and refine the final product. By choosing the right tool, you can improve both the quality and efficiency of your project.
Ready to start prototyping? Download our free checklist: "Key features to include in your app."
We hope that you will find this information useful. In the future also we will also continue to meet with such valuable insights. Take care, and see you soon!


